
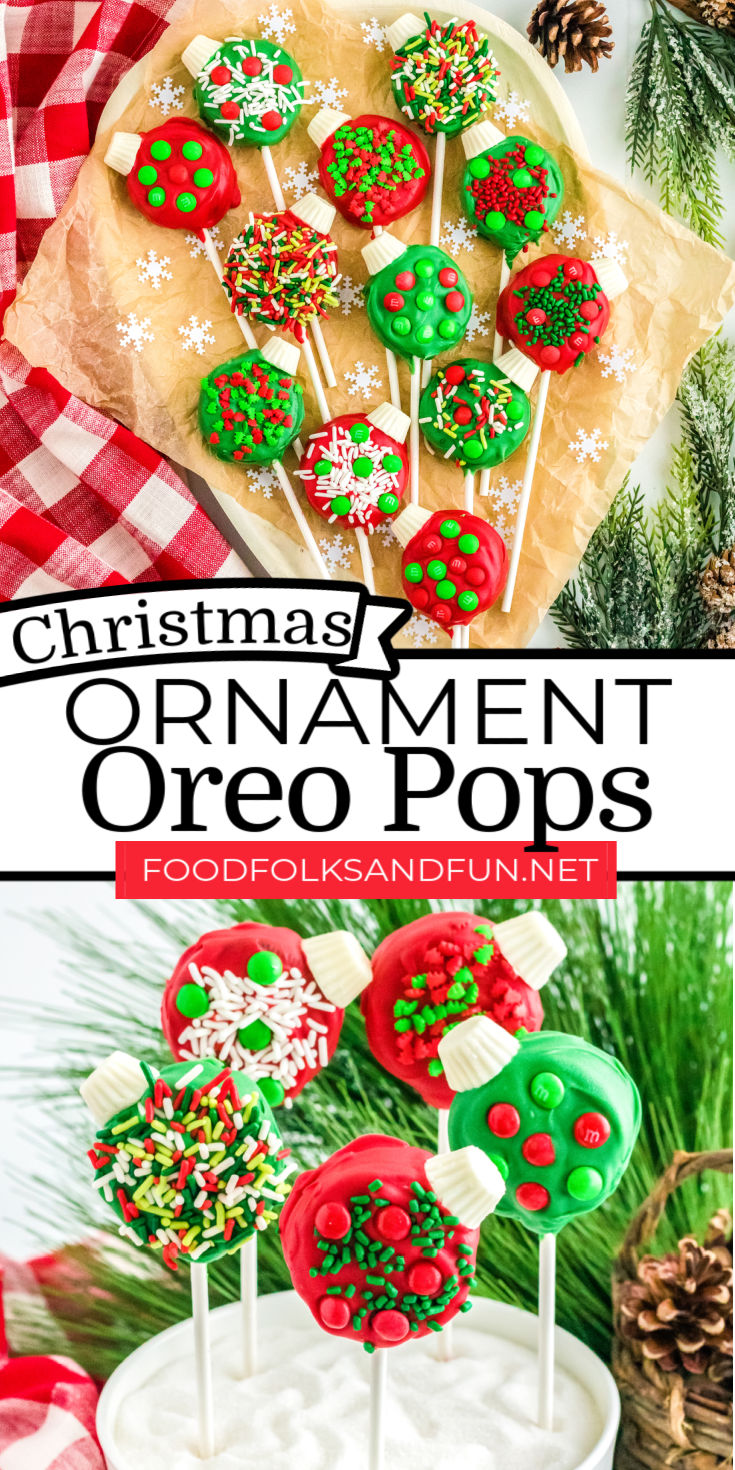
These Christmas Ornament Oreo Pops are fun, festive treats perfect for gifting or sprucing up cookie trays. Grab the kids because they’ll love making them with you!
It costs $19.90 to make this festive treat. The recipe makes 25 servings, which works out to be just $0.80 Oreo pop.
I love no-bake recipes during the holidays. In addition to these Oreo Pops, I love whipping up these Caramel Pretzel Turtles, these Peppermint Patty Candy, and these Christmas Wreath Cookies.

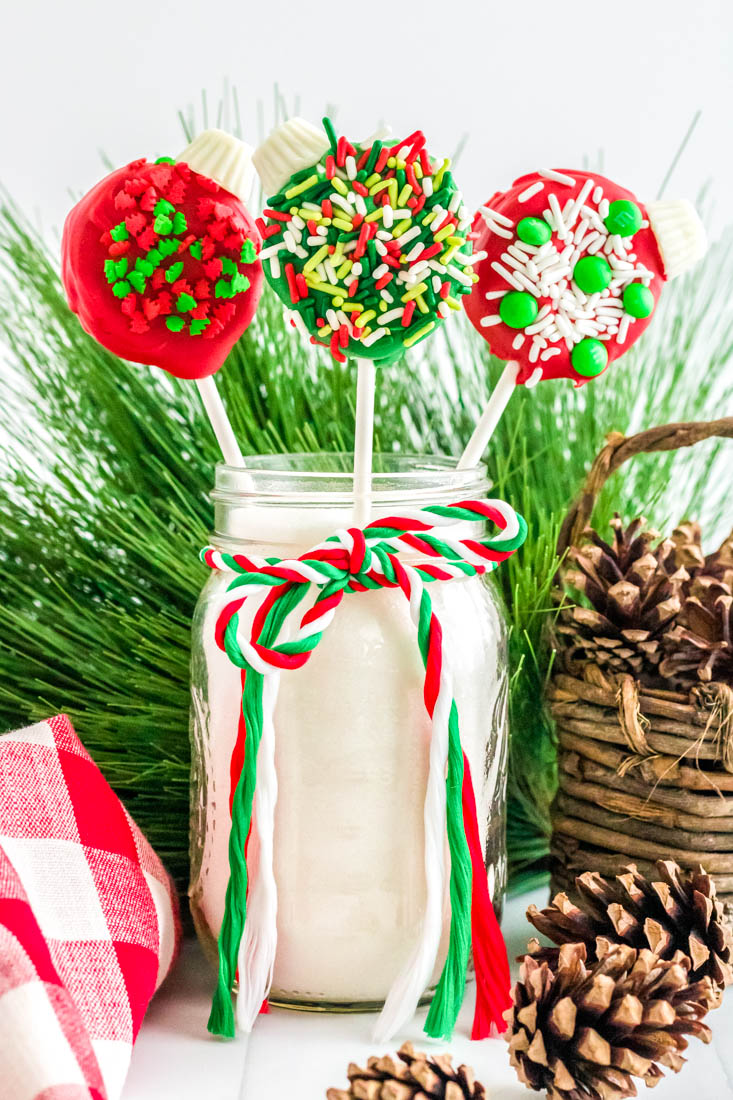
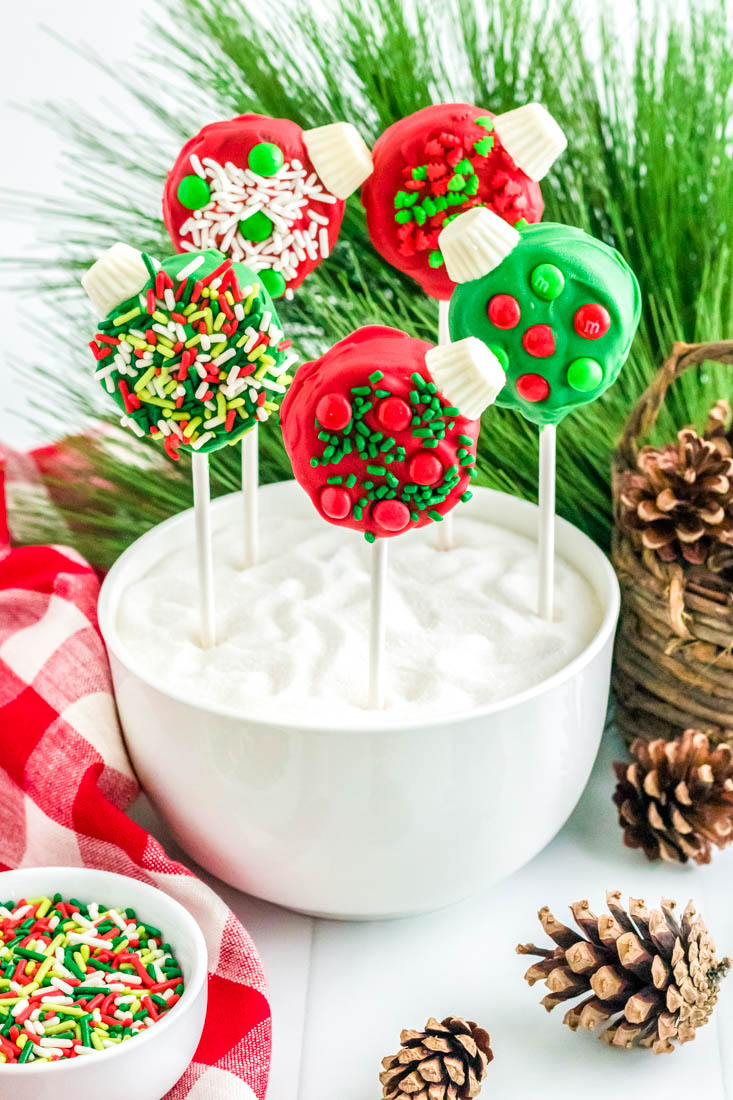
This simple, no-bake treat that’s festive and delicious is just what you need during this busy time of year. Oreos are dipped in chocolate and then decorated to look like a cute ornament with mini Reese’s peanut butter cups. You only need a handful of ingredients, plus the lollipop sticks, to make them!
These pops are great for parties or for adding to a holiday tray for gifting. Oreo Pops are like those adorable cake pops you see, but even more effortless with using a pre-made cookie instead of going through the hassle of making the cake pops.
Grab your kiddos or grandkids to get in on the fun of making these. They will love helping to dip the cookies in the chocolate and decorate them.
Ingredients and Instructions
Per Serving Cost: $0.80
Recipe Cost: $19.90
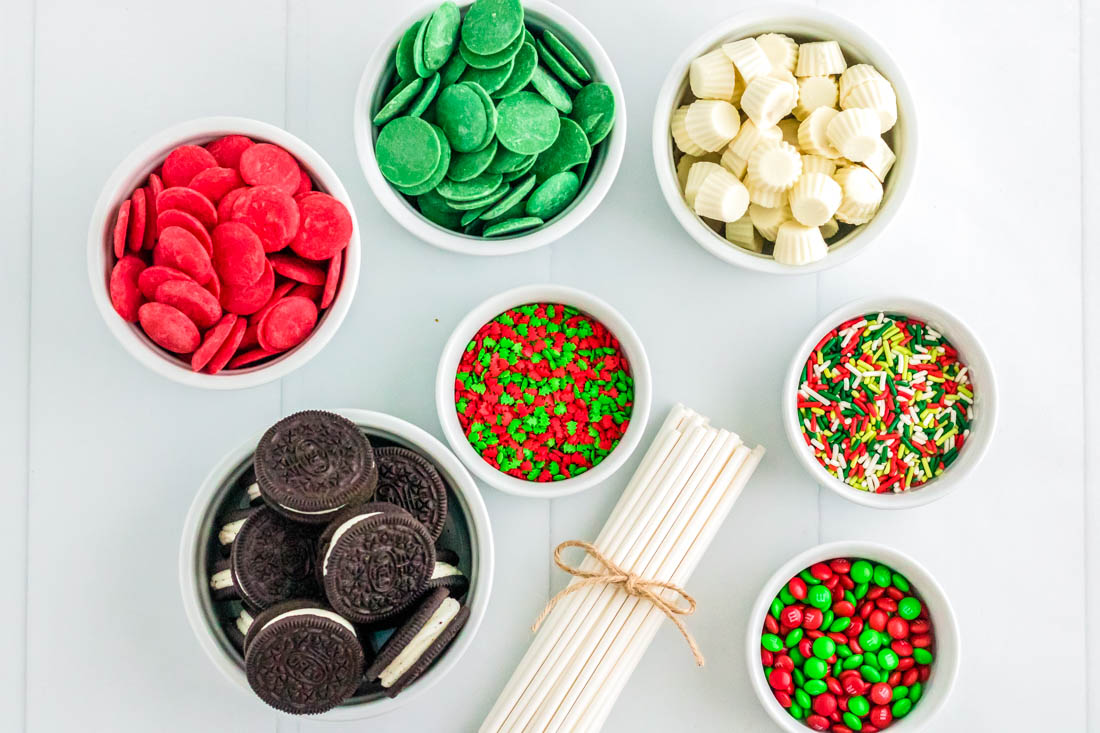
- 16-ounces Wilton dark green candy melts – $4.94
- 16-ounces Wilton red candy melts – $4.94
- 25 lollipop sticks – $0.75
- 13.2-ounce package of Mega-Stuf Oreos – $3.18
- 7-ounce bag unwrapped minis white chocolate Reese’s peanut butter cups – $2.98
- 1 cup mini M&M candies – $1.92
- ½ cup holiday sprinkles – $1.19
NOTE: The recipe prices are calculated by using grocery store websites. The actual cost of the recipe will vary depending on what ingredients you already have.
Instructions
- First, line two baking sheets with parchment paper and set them aside.
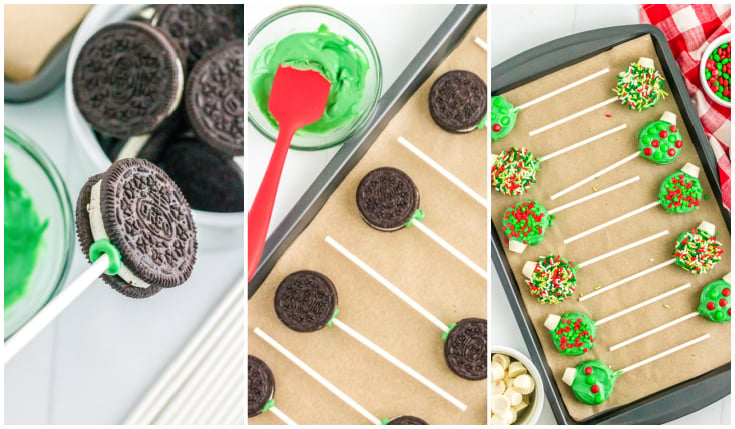
- Next, melt one chocolate color. Dip the end of a lollipop stick into the melted chocolate and then stick it into the white “stuf” of the Oreo.
- Melt the second color of chocolate and dip the end of the lollipop stick into the white “stuf” of the Oreo.
- Let the Oreos set in the fridge.
- Melt the rest of the first color of chocolate and dip an Oreo into it.
- Set the Oreo on the baking sheet and add the mini Reese’s cup to the side of the Oreo.
- Decorate the rest of the Oreo with sprinkles and other decorations.
- Place the Oreos in the fridge and repeat the process for the second color.
- Finally, serve chilled or at room temperature.
Recipe Variations
- You don’t have to use “Mega Stuf” Oreos, I just like how they make the Oreo pops look fuller and more like a rela ornament.
Storage Tips
SERVE: These are best when served chilled or at room temperature.
STORE: Store these in an airtight container at room temperature or in the refrigerator for 1-2 weeks.
FREEZE: Place the pops in a freezer-safe container and freeze for 1-2 months.
Cook’s Tools
- Baking sheets
- Measuring spoons
- Microwave-safe bowls
Recipe FAQ’s
Place the chocolate in a bowl and melt in 30-second intervals. Mix between each interval and repeat until chocolate is smooth.
This is a great tool to use for help with dipping items into melted chocolate. The fork is designed to balance the cookie on the tines of the fork while you dip it in the chocolate. The chocolate can then drip off evenly before you place the cookie on the baking sheet.

More Christmas Desserts
- Shortbread Cookie Recipe
- Christmas Divinity Candy
- 3 Ingredient Fudge
- Christmas Rice Krispie Treats
- Loaded Peppermint Cookies
- Christmas Tree Brownies
- Cut Out Sugar Cookies
- Christmas Wreath Cookies
- Gingersnap Cookies
- Christmas Oreo Balls

Christmas Ornament Oreo Pops
Equipment
- baking sheets
- Measuring spoons
- Microwave-safe bowls
Ingredients
- 16- ounces Wilton dark green candy melts can be found in craft stores
- 16- ounces Wilton red candy melts can be found in craft stores
- 25 Lollipop sticks or popsicle sticks
- 13.2- ounce package of Mega-Stuf Oreos
- 7- ounce bag unwrapped miniature white chocolate Reese’s peanut butter cups
- 1 cup mini M&M candies
- ½ cup assorted Christmas sprinkles
Instructions
PREP BAKING SHEETS:
- Line two large baking sheets with parchment paper and set them aside.
PREP OREOS:
- Start with one color first (I started with green). Melt 1 tablespoon of the meltable green chocolate in a small dish in the microwave in 30-second intervals until smooth.
- Dip the end of a lollipop stick into the green chocolate and stick it into the white “stuf” of the oreo. Push the stick about ½ to ¾ of the way through. Do this with half of the Oreos. Set them on the tray and set them aside or in the refrigerator for 5 minutes.
- Meanwhile, you can melt 1 tablespoon of the meltable red chocolate in a separate small dish in the microwave in 30-second intervals until smooth. Repeat the process with the remaining lollipop sticks and Oreos with the red chocolate. Set them on the second baking sheet.
- Pull the “green” chocolate Oreos out of the refrigerator and replace them with the “red” ones so that they can set.
MELT CHOCOLATE:
- Melt the rest of the green chocolate in a large bowl in the microwave in 30-second intervals until smooth.
DIP AND DECORATE OREOS:
- Dip a “green” Oreo into the green melting chocolate until it is coated.
- Place the Oreo on the baking sheet and add the miniature Reese’s cup to the right or left side of the Oreo, offset from the center. Decorate the rest of the Oreo with sprinkles, m&m’s, or other decorations of your desire. Work quickly so that the chocolate does not harden before you can decorate the Oreo pop.
- Repeat the process with each Oreo until they have all been decorated.
- Replace the “red” Oreo baking tray with the “green” one in the refrigerator so they can set.
- Melt the rest of the red chocolate in a large bowl in the microwave in 30-second intervals until smooth.
- Repeat the dipping and decorating process with the remaining red Oreo pops.
CHILL AND SERVE:
- Set them in the refrigerator for 5 minutes to set.
- Serve chilled or at room temperature.
Notes
- When you make these, I recommend making all of the green ones first, then all of the red ones (or vice versa). Move quickly so that the chocolate doesn’t harden before you’re finished dipping and setting the sprinkles and Reeses cups.
Nutrition
did you love this recipe?
Share it with me on Facebook and find more recipes on foodfolksandfun for more!


subscribe for new recipes
Get all the latest recipes in your inbox!
connect with us
Make sure to tag #foodfolksandfun on instagram!


I’m ready for allll things Christmas, and these Oreo pops are first on my list! They’re adorable and so easy too!
What a fun holiday treat. I know the grandkids would love to help make some of these. I think this will be the project for the next sleepover weekend.
These are adorable treats!
What a fun and festive treat that’s so easy to make!! Can’t wait to make this during the holidays and share it with our family and friends!
Oh how fun! My kids would love decorating these Oreo pops so much. Such perfect treats for the holidays.