

These Halloween Chocolate Covered Oreos are easy, festive, and delicious. Grab the kids because they will love making this fun Halloween treat with you!
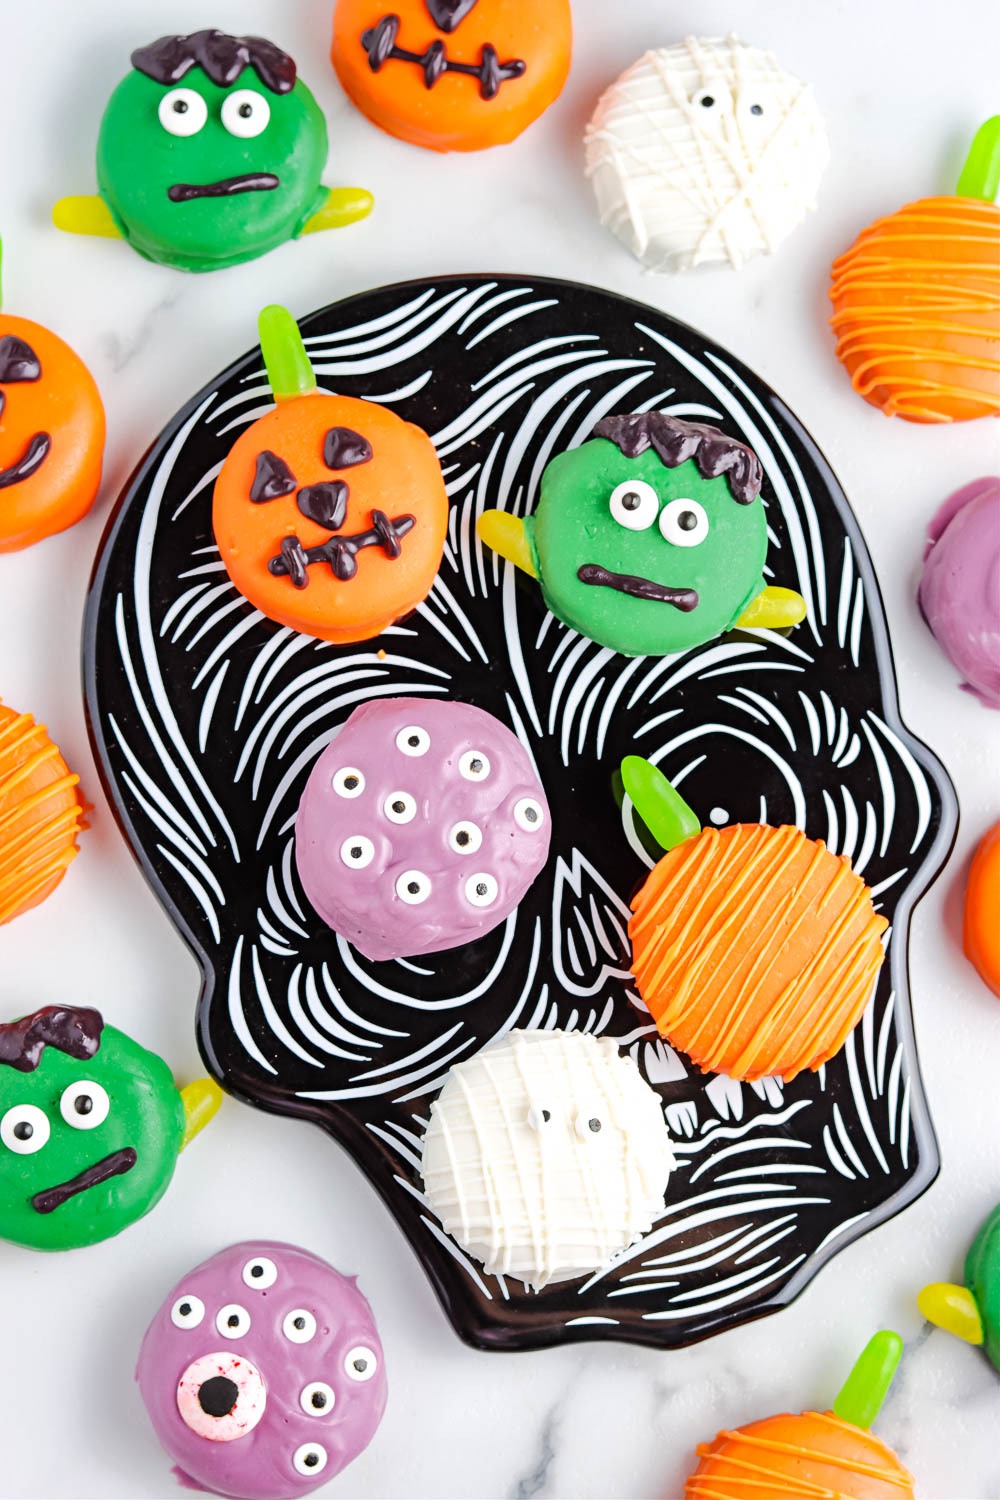
Table of Contents
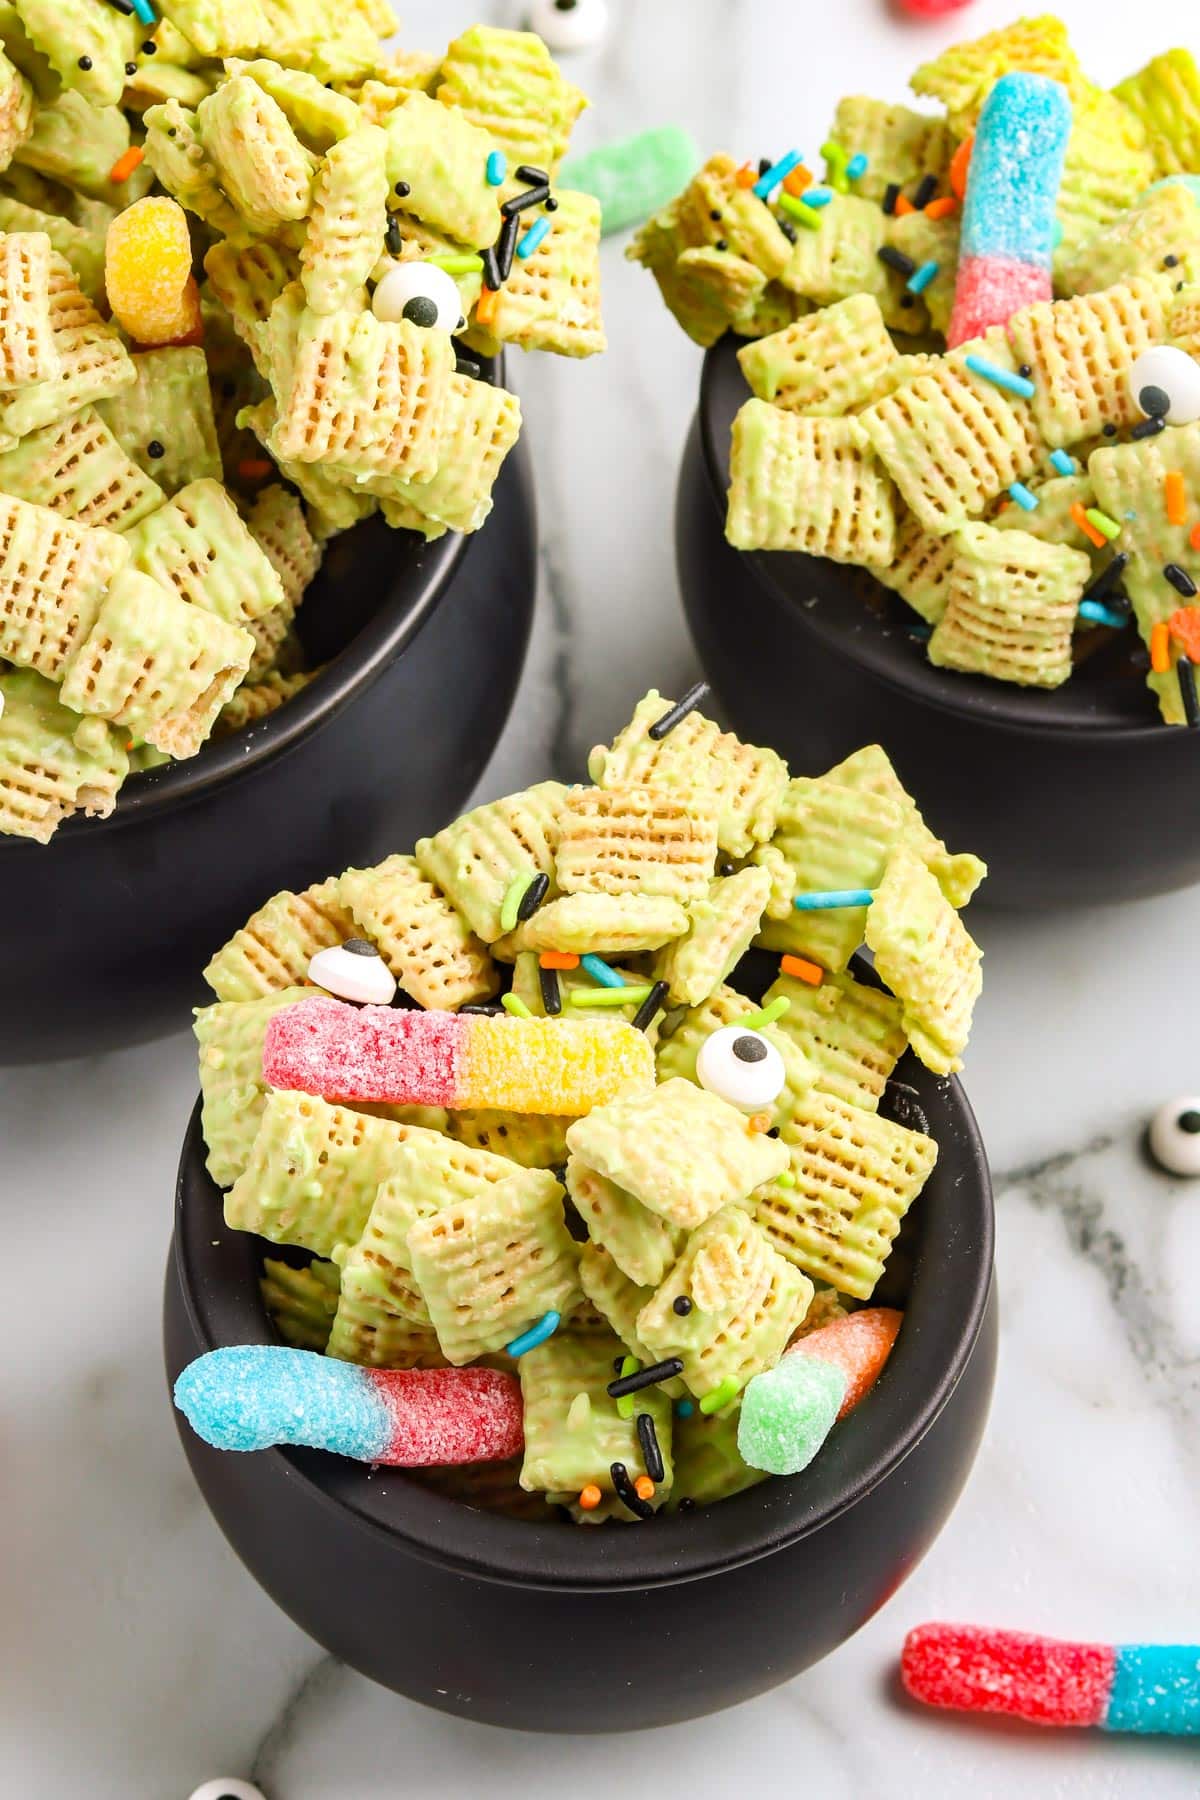
For more Halloween fun, make this Zombie Bait Chex Mix, these Sweet and Salty Candy Corn Cookies, and this Halloween Brownie Trifle.
Halloween Dipped Oreos
An Oreo is a classic cookie that everyone loves. But dip it in chocolate, and it becomes an extra special treat.
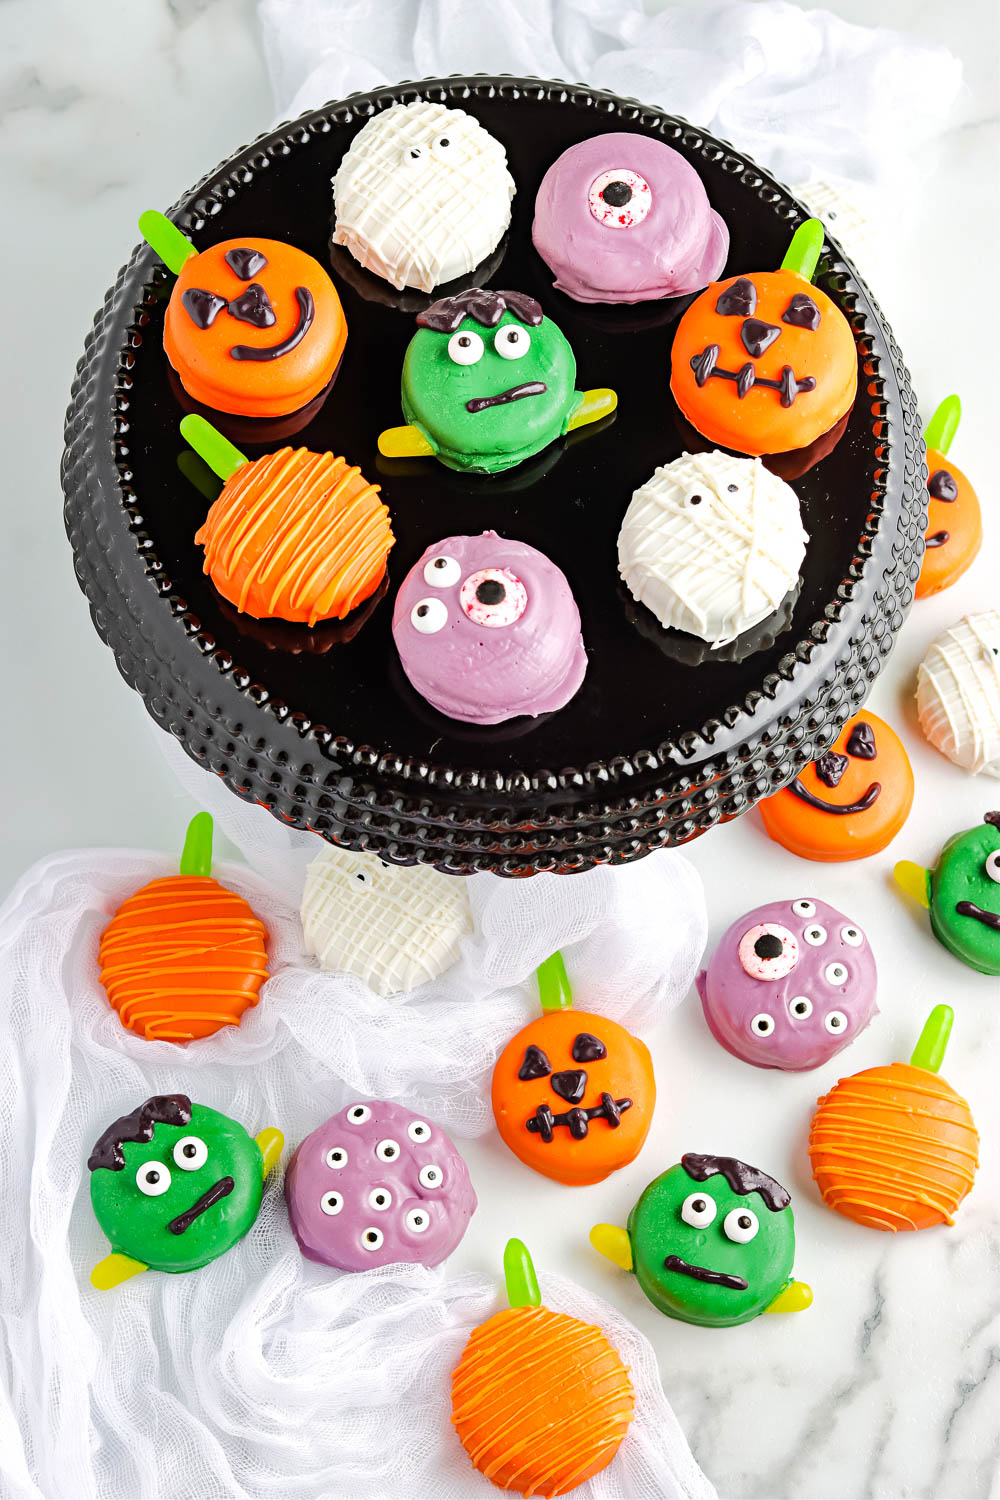
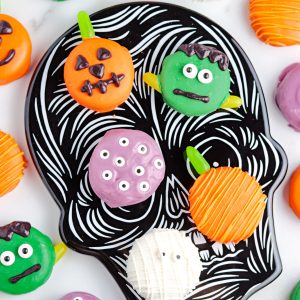
And these Halloween Chocolate Dipped Oreos are no exception! But, look how fun they are!
Grab your kiddos to help with the decorating and then serve them as a fun dessert, after-school snack, or bring them as a party favor. They look fancy but are very simple.
What is not to love? Fun, festive, spooky treats with a creamy chocolate coating with an Oreo crunch in the middle. Chocolate does make everything better!
Ingredients and Cost
Per Serving Cost: $0.49
Recipe Cost: $17.08
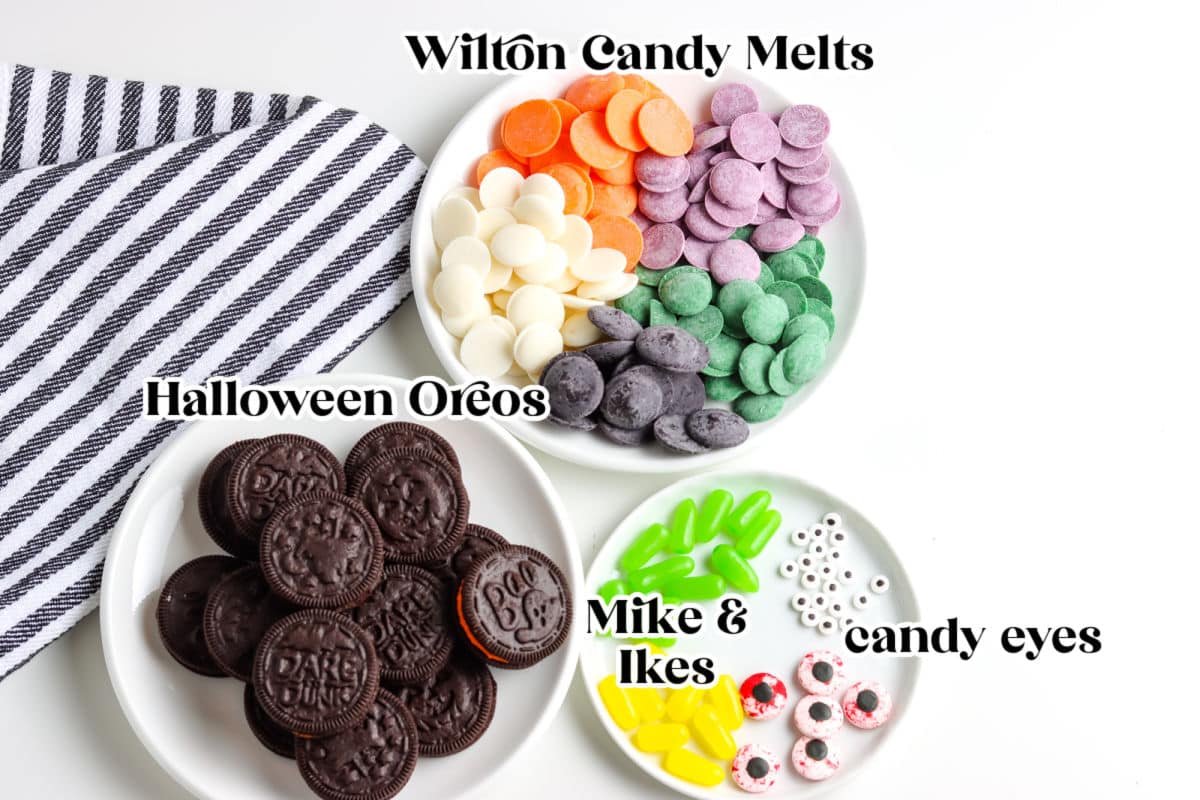
- 1 package Oreos – $4.29
- 2 bags Wilton Candy Melts – $9.56
- 1 box of Mike & Ikes – $1.24
- ½ package of candy eyes – $1.99
NOTE: The recipe prices are calculated using grocery store websites. The actual cost of the recipe willon what ingredients you already have. Prices were updated in October 2024.
How To Make Hallowen Chocolate Covered Oreos
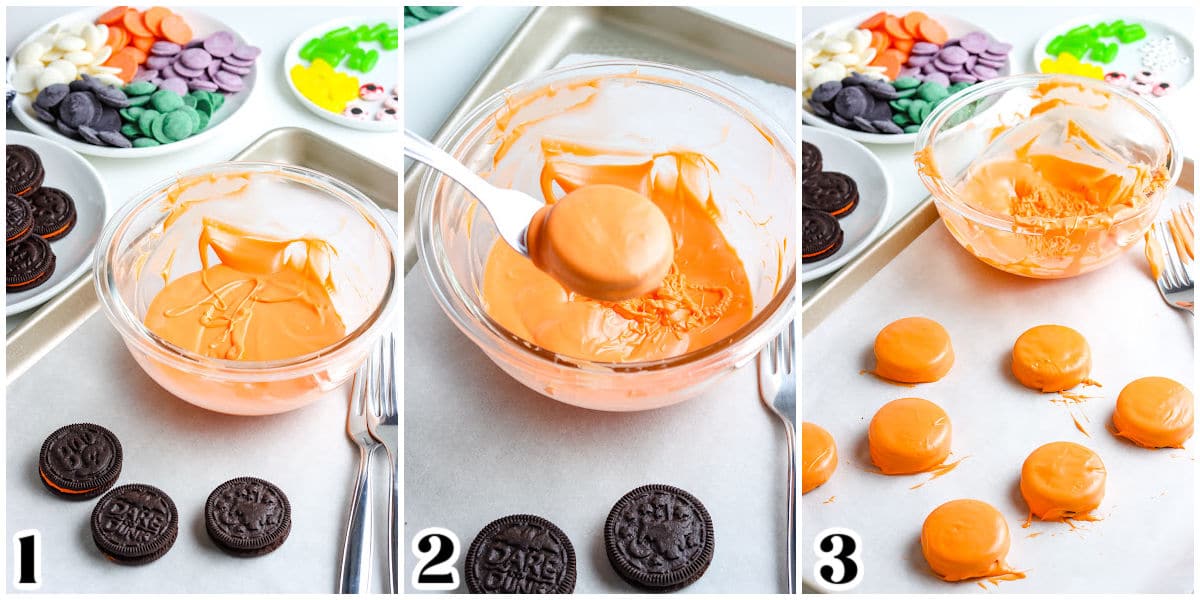
- Melt the candy melts colors in microwave-safe bowls.
- Use a fork to coat the Oreos in the melted candy melts.
- Place the dipped cookies on a parchment-lined baking sheet.

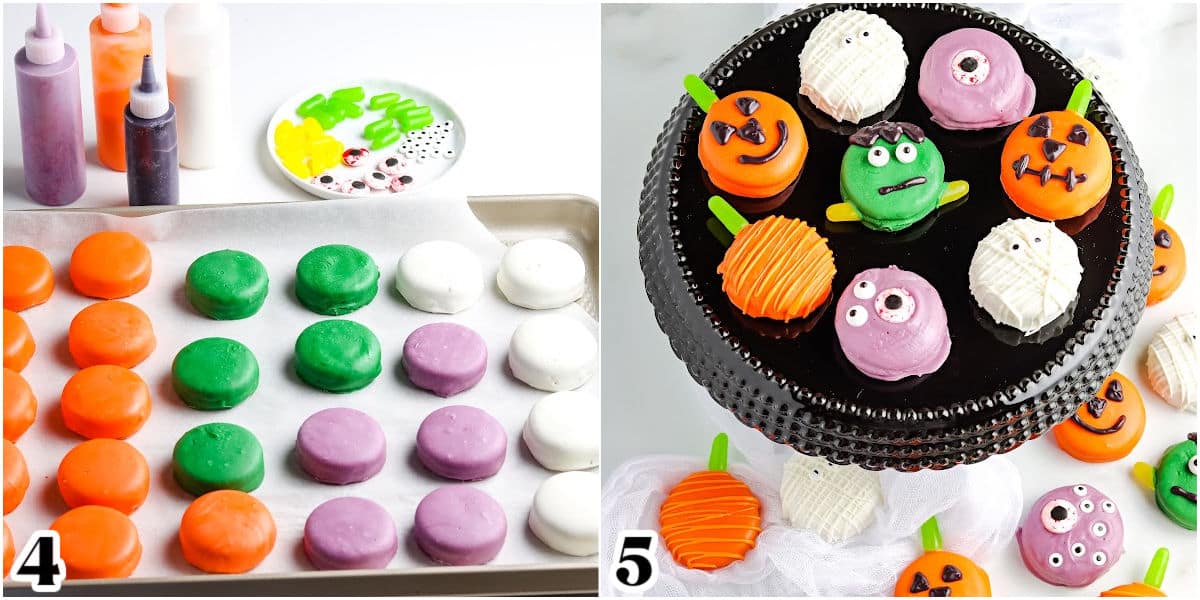
- Let the dipped Oreos set for at least 15 minutes.
- Decorate as desired.
Halloween Oreo Decorating Ideas
You can decorate these Halloween Dipped Oreos in various ways:
- Eyeballs
- Frankenstein
- Mummy
- Jack-o-lantern
- Pumpkin
Recipe Variations
- There are so many types of Oreos now. Choose your favorite flavor and have at it! Golden Oreos and Peanut Butter Cream would both be delicious.
- While these chocolate-dipped Oreos are decorated for Halloween, you can decorate them for any holiday, party, or occasion.
Storage Tips
SERVE & STORE: Serve and store at room temperature. Store in an airtight container for up to two weeks.
FREEZE: I do not recommend freezing these chocolate-dipped Oreos because the chocolate doesn’t look quite right once they’re defrosted.
Cook’s Tools
- Plastic squeeze bottles
- Microwave-safe bowls
- Forks and spoons
- Parchment paper
- Baking sheet

Recipe FAQs
They will stay fresh for up to two weeks as long as they are stored properly. Keep them in an airtight container at room temperature to help them stay fresh.
Oreos do make a limited edition Halloween Oreo with an orange cream filling. These would be super cute (and yummy!) to use with this recipe. However, plain Oreos are just as delicious!
I prefer to use chocolate candy melts with this recipe. It creates a smooth thin coating which is perfect for dipping the Oreos into and then decorating. I do not recommend melting chocolate chips as they are too thick and go on as smoothly as candy melts.
More Holiday Recipes
Save The Recipe
Enter your email below & we’ll send a link to this recipe to your inbox & you’ll subscribe for new recipes
Halloween Chocolate Covered Oreos
Equipment
- Plastic squeeze bottles
- Microwave-safe bowls
- Forks and spoons
- parchment paper
- baking sheet
Ingredients
- 1 package Oreo cookies
- 2 packages Candy melts variety of color, we used orange, purple, green, black and white.
- Decorations – candy eyes candy (I used Mike and Ike)
Instructions
DIP OREOS IN CHOCOLATE:
- Line 2 large baking sheets with parchment paper.
- Begin by melting all of the chocolate in the microwave, one color at a time, in separate bowls. Start with about ½ a package.
- Heat for 1 minute, then stir, continue heating 30 seconds at a time until the chocolate is almost melted. Stir until completely melted.
- For each color, coat the cookie in melted chocolate. Using forks, dip with 1 fork, shake off excess, then use the other fork to remove the cookie onto parchment paper.
- Let dry for at least 15 minutes.
- You may need to double coat the cookie depending on how well the first coat covers the cookie.
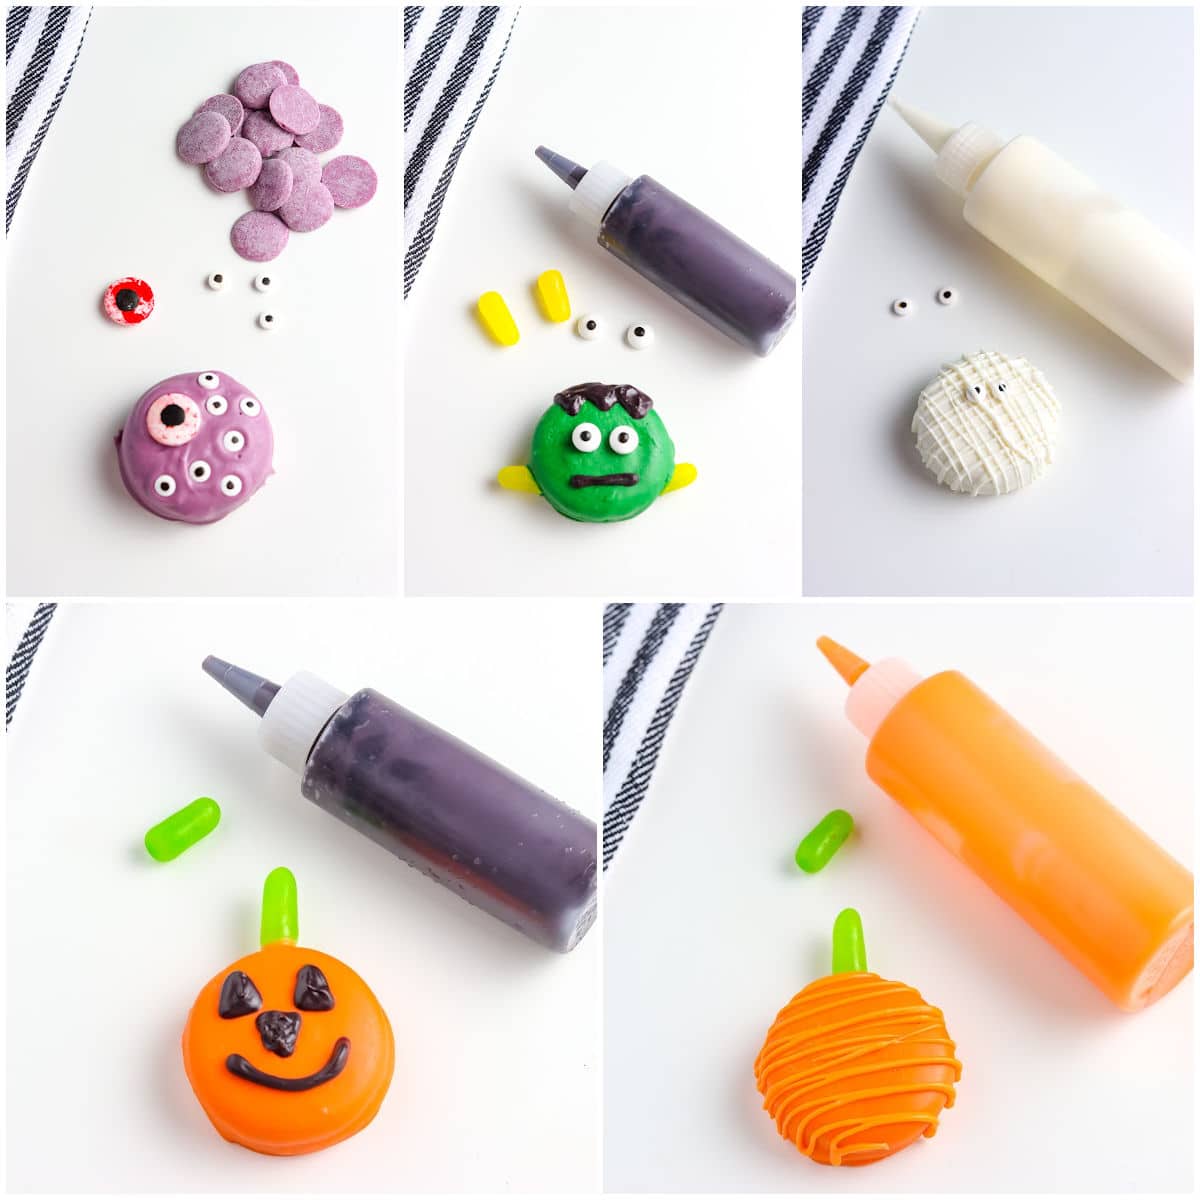
TO DECORATE:
GHOST:
- Coat the cookie in white candy melts using the directions above. Dry completely.
- Melt white candy melts and transfer them to a plastic squeeze bottle.
- Drizzle cookie with melted white chocolate.
- Add eyes, then drizzle in another direction.
MONSTER EYE:
- Coat the cookie in purple melted chocolate and immediately add eyes.
PUMPKIN:
- Coat the cookie in orange candy melts using the directions above. Dry completely.
- Melt orange candy melts and transfer to a plastic squeeze bottle.
- Drizzle cookie with melted orange chocolate.
- Add a small amount of melted chocolate to the end of a green candy for the stem.
JACK O’ LANTERN:
- Coat the cookie in orange candy melts using the directions above. Dry completely.
- Fill a plastic squeeze bottle with melted black candy melts.
- Draw a face on the cookie.
- Add a small amount of melted chocolate to the end of a green candy for the stem.
FRANKENSTEIN:
- Coat the cookie in green candy melts using the directions above. Dry completely.
- With a small amount of white melted chocolate, add eyes.
- Using the melted black chocolate, add the hair and mouth.
- Cut pieces of yellow candy for the bolts at an angle.
Nutrition
did you love this recipe?
Share it with me on Facebook and find more recipes on foodfolksandfun for more!
subscribe for new recipes
Get all the latest recipes in your inbox!
connect with us
Make sure to tag #foodfolksandfun on instagram!


Oh these are super cute. I am definitely trying them at the weekened.
I can’t wait to make these for our trick or treaters this year! This recipe is so fun and too easy, thank you!
What a great idea! My kids love Oreo cookies so I know they’ll love making these!
How fun are these! We are still planning Halloween, and these look perfect. Thanks for sharing. Saving for later!